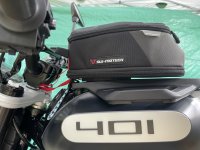
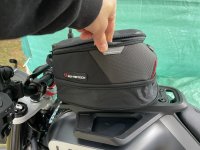
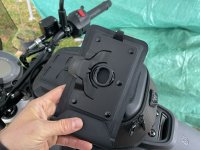
SW-Motech PRO Tank Ring and DayBag Tank Bag on 2021 Svartpilen 401 or 701

RobWCanada

expert rider
Joined
Sep 12, 2021
Messages
156
Location
Toronto
AC904FD8-49B0-44EA-96B2-B735F15BDAB2.jpegAlright. So I said I’d post it and here it is. Keep in mind these modifications to the ring are so I didn’t have to remove or modify the tank rack. If I messed up the ring it was $40 CDN, the rack …who knows how much. $150?

This will/should work with a 401 or 701!

Parts List:

  • TRT.00.787.16000/B - SW-Motech PRO Tank Ring - Triumph
  • BC.TRS.00.152.30000 - SW-Motech Smartphone-Drybag für MOLLE-Aufsatz - Schwarz.
  • BC.TRS.00.108.30000 - SW-Motech PRO Daypack Tankrucksack - 5-8 l.
    • MAKE SURE not to get the "Magnet" version...that does NOT work with the tank ring mount.
    • All PRO tank bags are "magnetic" to the ring...this is confusing and I almost bought the wrong bag myself!
  • TRT.00.787.10100/B - SW-Motech Erhöhungselement für PRO Tankring/Tankringe - Schwarz. Für Erhöhung um 6 mm
    • They call this the "height increasing element", it is needed. You could potentially get the 12mm and have it even higher. This would make turning the key easier.
  • A2-70 (304, 18-8) stainless steel screws
    • 2 x M5 x 0.8 x 25mm flat head cap screws
    • 2 x M5 x 0.8 x 25mm button head cap screws (may be called "round head")
  • 17/64" drill bit
It can be hard to find this SW-Motech stuff in stock. I managed to find it all at FC-Moto...and the price was great. But make damn sure you want it cause it's coming from Spain so return (although an option) isn't worth it!

I think that's it. Loctite 243 (not 242 -- not oil resistant like 243). I also use Loctite surface prep...but up to you.

PROS:
  • So far I love it. Looks great, comes off easy enough once you get the hand of it. You have to pull directly forward (not forward and up).
  • Bags are interchangeable -- so I can get the bigger bag and use it or if a one day small trip just put on the small bag!
  • Comes with a waterproof cover
  • Looks great
  • easy to fill up due to removal (I had a strap system before)
  • the bag is a magnetic mount. ...it kinda just drops on the mount and "snaps" into place...very neat.
  • Same with removal, pull the strap and it "pops" up
CONS:
  • Removal. Although fairly easy (much much easier than dealing with clips and straps woven through the tank rack) it does require some strength to pull the red pull release strap. This is not a fault of the system but rather how the Svartpilen tank filler location, key location and handlebars close to the filler. Handlebars make it slightly awkward to pull the strap. But like I said, once you get your position it's a quite pull and the bag kinda "pops" up and releases.
  • Key vs bag location. Nothing can be done here. The key winds up under the front of the bag (you can see in some of the photos). You can still turn the key off and on, but would need to remove the bag to remove the key. It's okay as usually I'm stopping to put gas in anyway...or if your stopping you're probably taking the bag with you...I dunno. But do keep this in mind.
    • Even with 12mm element height expander which would look odd imo, wouldn't allow you to remove the key while the bag was on

Anyway, here are the pics.

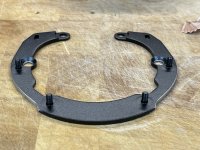
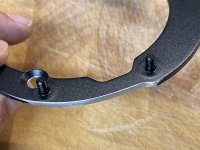
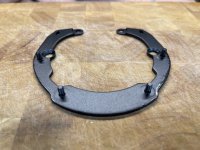
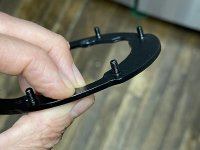
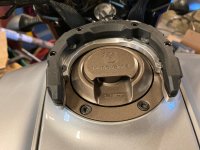
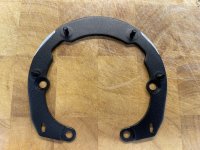
Tank Ring before modifications. The white marks on the left and right were estimates of how much needed to be removed to fit around the tank rack. I had to do about 2mm more. The ring is made of aluminum but even after modifications still seems very strong. About 1/8" thick. Use a sanding wheel or fine grinding wheel ...or maybe a dremel. Aluminum gunks up the surface...dunno if there's a better way to grind/sand aluminum.
528E39EC-66D5-4A7A-8FA1-32296AC6F5A3.jpeg

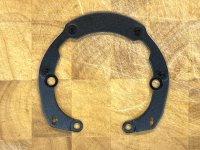
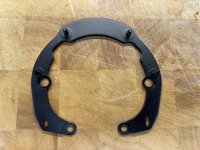
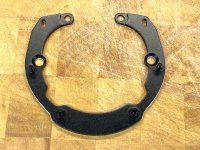
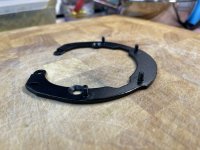
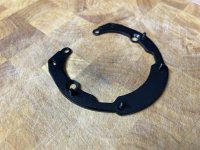
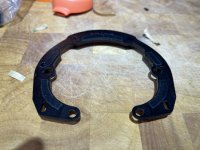
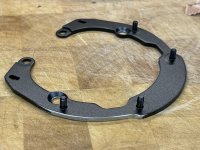
Tank Ring after grinding and sanding smooth. I could have left it but decided to finish with some semi-gloss black Tremclad.
I also made the center holes by the screw studs a little larger as the holes are not "100%" but oh so close. I'm quite certain there isn't a closer matching tank ring.
I use a 17/64" drill bit to enlarge the holes. Honestly maaaaybe not required but I didn't want to go through the hassle of painting everything only to have to then paint the bored out holes later...lol
947E8CC7-8D1C-43A5-8371-2F1449223918.jpeg601B8A8B-B19F-4583-8120-0E5B3D836ABC.jpegB1B0328A-A3DC-4905-963A-5E9949EA73B1.jpegCD625756-76DD-4746-A6CC-ECC9ECD336BB.jpeg69103DFE-8E46-41F0-BF5F-CDCEAA59D56D.jpegB996AA98-1932-4C24-B3C8-0C9FC4E5DB99.jpeg

Traced the tank ring to a template, in case anyone wanted a guide...I can send you a better version of it if you want...
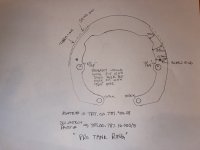
image.jpg
 
Last edited:
Tremclad Semi-Gloss Black. I just painted on the Tremclad with a fine paint brush instead of spraying the whole piece. Original paint is obviously more resistant. Once the plastic/fiberglass tank ring is installed on top you don't even see the Tremclad except on the edges. So essentially I just painted so it wasn't raw aluminum. I did put a Tremclad primer on before painting.
D7C3C5B5-83A0-4C5C-9C57-A6C2C95D9E7C.jpeg4B45D0BC-7AB5-4088-90B5-1A88085B448B.jpeg0407D374-2D5A-4364-989B-D690D8001400.jpeg83CD1995-7E18-42E9-87D5-4CE29108EC5D.jpeg

3M rubber insulators. Not sure they were required. There was maybe a 0.5mm gap between the ring and the gas tank filler ring. The kit comes with some stainless spacers which slightly elevates it above the tank ring. anyway. I put em on anyway to prevent the Husky tank ring from wear and vibrational "scuffing".
043D7C71-29D8-44E0-807A-E604C38CC1B6.jpeg

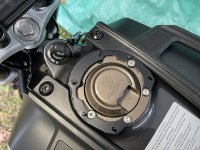
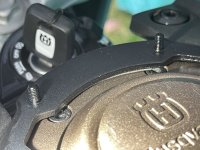
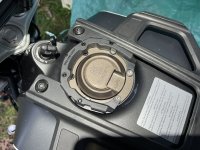
Pro Tank Ring installed!! You will need to purchase additional screws as the set only comes with 1 40mm button head cap screw. I bought 2 M5 x 0.8 x 25mm stainless flat cap screws and 2 M5 x 0.8 x 25mm button head cap screws. Before I realized I only had one button head I did cut down the ones that came with the kit. The kit comes with 2 stainless flat cap screws M5 x 0.8 x 40mm. I found the perfect length was 27mm and the head just sticks out the bottom "mouting" plate...you'll know what I mean if you look inside the gas filler and see how it's mounted. You could get away with purchasing 1 button head 25mm but then it wouldn't match the one in the kit. So bare minimum imo is 25mm button head cap screws. A2-70 refers to the stainless steal type. A2 may rust but not likely on a bike unless in corrosive env. If so, get A4.
81C47A35-40D5-4597-A7EF-80094AB593C7.jpegD3303C24-0620-4F96-AF75-EBBD5772738A.jpeg

Showing the 3M insulator tape. Weird angle...you don't see it except on this angle lol.
8084C443-CF2D-40D3-A370-AB21D18207E6.jpeg


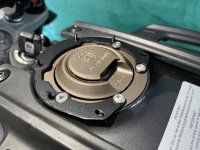
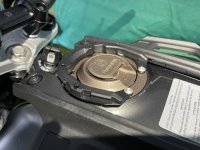
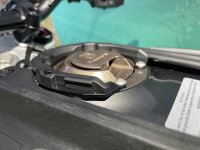
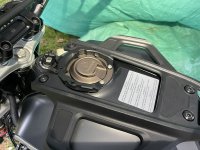
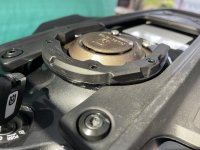
Fancy PRO TANK RING installed onto the aluminum base. Looks pretty nice imo. Kinda like it was meant for this bike!!
805BA967-E80B-4DE0-9CD4-DEF83045D2A2.jpeg2CEBE000-2AB0-4C90-BB9D-0D7B9CF1F57B.jpeg
 
Last edited:
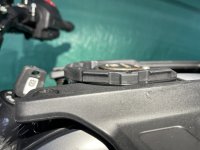
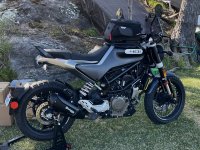
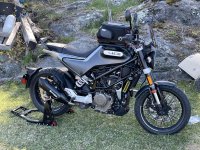
More PRO TANK RING installed pics.
FAB383BD-9E5E-4071-A725-E996B8A35CD6.jpegCB837572-BE4E-46AC-B75E-D66660260B47.jpeg0F142654-694B-449C-B610-B78581B0DA67.jpegA63F7723-B78D-4DA8-963E-B1F236FF3A40.jpeg


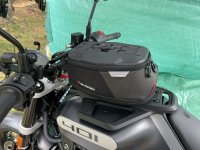
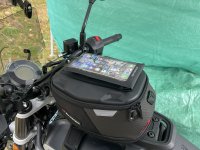
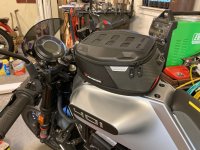
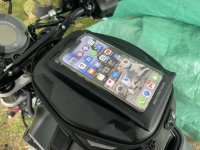
PRO Tank Bag. DayPack (5L > expandable to 8L). I think I could have got the bigger one (PRO SPORT Tank Bag - 12L > expandable to 17L) but not too sure. I ordered from Spain so I didn't want to take the chance. But now that I know the ring works I may try ordering the slightly larger bag locally so if it doesn't fit I can return the sucker.
6C14CDEA-642C-4F73-A865-49026748B263.jpegACCBB9F6-D005-4FC2-B5B3-44B2747F4196.jpeg

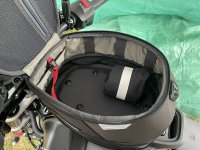
PRO DayPack expanded to 8L
E711D96D-9064-481D-9164-EFD0598FD89E.jpeg3101218B-739C-40A8-AC8B-E08EDBE351AD.jpeg

Waterproof MOLLE Phone mount sleeve, large size. Kinda neat. Just clips on top of the bag. Was only $12 I think...
479B9A3F-F22C-4DAE-8514-73E23616810C.jpegFF6D0A3C-3DC2-4195-AD16-5FD23FFFC079.jpeg
 
Last edited:
That's a neat setup and a good looking bag for the bike.

And a note of caution for shaping the alloy ring piece. Grinding aluminium on a grinding wheel is a big no-no in any workshop. The metal will clog the wheel, causing heat build up and a possible fracturing of the wheel. And when they go, they go with a vengeance. The easiest way to shape soft alloys is with a coarse file with a special cut designed not to clog.
 
Oh...I bought this
That's a neat setup and a good looking bag for the bike.

And a note of caution for shaping the alloy ring piece. Grinding aluminium on a grinding wheel is a big no-no in any workshop. The metal will clog the wheel, causing heat build up and a possible fracturing of the wheel. And when they go, they go with a vengeance. The easiest way to shape soft alloys is with a coarse file with a special cut designed not to clog.

Ah yes, I agree. I was taking it super easy and watching make sure it didn’t get clogged up. It was a fairly coarse wheel so it didn’t get too clogged. I finished with a file though like you suggest.

I didn’t try a disc sander (one of those stationary ones). I imagine that would work well. Other than the sand paper getting clogged up.
 
Hey guys, update here on bag options.

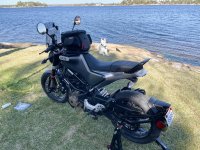
Since it’s the tank ring there’s other options for the bag. The bag I got (the DayPack), a bit small for anything other than a quick jaunt. Oddly, this is how big most tank bags are. And I believe the Husky tank bag is even smaller at 5L…not sure though.

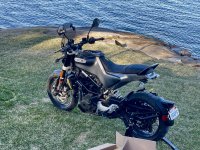
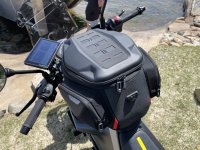
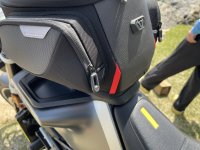
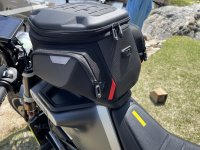
Anyway, with some coercing I got the SW-Motech Pro Trial bag to fit! This bag is twice the size and imo actually looks like it fits the tank rack better than the smaller bag. It is pretty decent in size (I fit a 750ml bottle of whisky in there — lol, no not drinking and driving — just was out and found this rare Canadian whisky at the LCBO…)

This bag is 13L, expandable to 18L!!!

Comes with a raincoat cover like they all do.

Anyway, pics for you to judge.

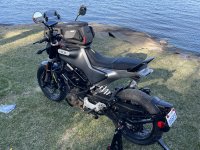
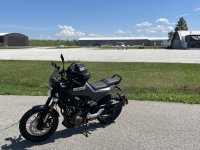
And that’s the Ergo seat too. It’s more comfortable for sure. But what I noticed most was the grip. You don’t slide around like the original. Quite nice. And I personally think it looks a bit better.
 

Attachments

  • 8B760F58-DE6B-4352-8350-466A15E80743.jpeg
    8B760F58-DE6B-4352-8350-466A15E80743.jpeg
    900.2 KB · Views: 63
  • F0A028CF-336C-4F37-9335-82609D5F6503.jpeg
    F0A028CF-336C-4F37-9335-82609D5F6503.jpeg
    748.8 KB · Views: 66
  • CBBB1980-6F73-426A-93D5-FF9E9709E5A3.jpeg
    CBBB1980-6F73-426A-93D5-FF9E9709E5A3.jpeg
    870.5 KB · Views: 64
  • 6BAA116E-DA10-4D2E-969B-53A2D4F2D70D.jpeg
    6BAA116E-DA10-4D2E-969B-53A2D4F2D70D.jpeg
    899 KB · Views: 64
  • E22B6F72-BDAC-4107-B818-2460D7CDD12F.jpeg
    E22B6F72-BDAC-4107-B818-2460D7CDD12F.jpeg
    885 KB · Views: 62
  • CD47F03D-344C-45BB-BD7B-373AC9032492.jpeg
    CD47F03D-344C-45BB-BD7B-373AC9032492.jpeg
    615.3 KB · Views: 59
  • 08F60762-7261-4595-8DF0-F55D39395CB5.jpeg
    08F60762-7261-4595-8DF0-F55D39395CB5.jpeg
    569.9 KB · Views: 56
  • AD1EDE01-3AD0-4365-8F76-B01023FA23E3.jpeg
    AD1EDE01-3AD0-4365-8F76-B01023FA23E3.jpeg
    565.2 KB · Views: 54
  • 5A8B393F-B33D-4944-A935-620D36DEF8A9.jpeg
    5A8B393F-B33D-4944-A935-620D36DEF8A9.jpeg
    688.8 KB · Views: 59
Last edited:
Oh, I should add that complete lock to lock clearance for the handlebars too. It doesn’t even get in the way of my Zumo XT…
 
Mate, great guide but something doesn't make sens to me. The problem with SW Motech's Pro Ring setup is that Husvarna's tank cap sticks out too far out, which prevents the clip-on plate that you screw to the bag (or the height extension plate) to clip onto the Pro ring, as it pussesh at the center of the plate, making the plate swings side to side but unable to clip on the ring. The only way around it seems to be to raise the ring itself, but it seems all you did was raised the the bag itself to avoid conflict with the rack, while the ring stayed at the original height.
Can you elaborate on that?

I am trying to do the same thing on Norden 901, which seems to have exactly the same fuel cap.
Hmmm. All I did was sand/grind down the ring to fit around the rack (like you said) and attached it to the tank. Used the 3M rubber that came with the SW-Motech pro ring (about 2mm thick). And bolted it on with some custom cut stainless (the sw kit doesn’t have the right length screws).

Are you saying your Husky cap (the part that flips up) is interferring with the bottom of the bag mount? Do you have some photos? Maybe the Norden is slightly different.

I can tell you I don’t have this issue. Just used my big bag today. The PRO Trail Bag. No issues. And with my super stack of spacers I can actually take my key out without removing the bag. Haha. I actually like the big bag setup better.
 
Mate, great guide but something doesn't make sens to me. The problem with SW Motech's Pro Ring setup is that Husvarna's tank cap sticks out too far out, which prevents the clip-on plate that you screw to the bag (or the height extension plate) to clip onto the Pro ring, as it pussesh at the center of the plate, making the plate swings side to side but unable to clip on the ring. The only way around it seems to be to raise the ring itself, but it seems all you did was raised the the bag itself to avoid conflict with the rack, while the ring stayed at the original height.
Can you elaborate on that?

I am trying to do the same thing on Norden 901, which seems to have exactly the same fuel cap.
Hey,

I was just thinking. I hate to ask a stupid question, but are you sure you got the PRO tank ring and not the older version? EVO I think it is…

From what I remember, the PRO clip/magnet part is almost flat on the bottom of the clip part, it doesn’t hit the cap on my bike.

However, the EVO has a bulge/hump on the bottom, which would definitely not work without modifications to the clip.

Maybe post some photos of the issue? I’m curious.

FYI, I googled the Norden tank cap and it does look like the same dimensions…so I don’t think it’s that.

R
 
Hey. I made those assertions based on ring parts no assembled, but just put together. It did not fit well.
Today, I assembled it, screwed to the tank and voila - fits perfectly and the bag attaches. Maybe those rubber things rise it enough. In any case, I am stoked - Norden is famous for not having any sensible tankbags fitting. Givi, SWMotech and Hepco all make brain-dead dedicated Norden mounts that makes tankbags (and the bike partially) completely unusable.
But with this non-dedicated fitting, it's finally over!
So awesome. Good to hear. Glad my post helped someone else.

Yeah, I love mine and like I said before as awkward as it looks on the little Svart, I like the trial bag the best haha.

Which bag did you fit onto the Norden?


R
 
Have not decided yet. I think I will get at least two. Likely candidates are Micro or Daypack + Trial or City.
I need them to work on my MT10, too.
 
Micro will be super small. I think daypack and trial or city would be good. I obv have daypack and trial. From what I remember the city is for bikes with super steep slope. Like gs1250
 
Hi! Mine is slightly different solution but works just as well. I wish I read this thread before tackling it though - I didn't know Triumph has the same bolt spacing on the fuel filler. I used the ring for KTM, thinking that they are the same company and they must share those inconsequential parts like fuel filler bangs, but no! So I ended up making an adapter plate out of 1/4" aluminium, to which the mounting attaches to. It turned into a bit more work than I initially thought, and I don't even know how much I'd use it, but now I have an option.
 

Attachments

  • IMG_7157.jpg
    IMG_7157.jpg
    459.4 KB · Views: 21
  • IMG_7158.jpg
    IMG_7158.jpg
    396.9 KB · Views: 22
  • IMG_7156.jpg
    IMG_7156.jpg
    447.5 KB · Views: 21
Hi! Mine is slightly different solution but works just as well. I wish I read this thread before tackling it though - I didn't know Triumph has the same bolt spacing on the fuel filler. I used the ring for KTM, thinking that they are the same company and they must share those inconsequential parts like fuel filler bangs, but no! So I ended up making an adapter plate out of 1/4" aluminium, to which the mounting attaches to. It turned into a bit more work than I initially thought, and I don't even know how much I'd use it, but now I have an option.
Ah, I get it. Nice solution.

So you attached the 1/4” plate to to where the tank ring screws are and then screwed the SW-Motech tank ring to the 1/4” plate. I assumed you threaded your 1/4” aluminum so you can screw the SW-Motech (shorted? screws…or did you just go straight through the 1/4”?)

This may help some with, I believe someone with a Norden was having issues with clearance. Even would be helpful if you didn’t want to use the PRO tank ring, but the EVO (which needs more clearance).

R
Yeah, that's exactly how it is mounted. I had to buy shorter screws to mount the the SW-Motech mounting plate on to the aluminium plate, which is tapped. This still does not help with the key though, there just isn't enough clearance to remove the key. Like you said, not a huge deal.
 
Yeah, that's exactly how it is mounted. I had to buy shorter screws to mount the the SW-Motech mounting plate on to the aluminium plate, which is tapped. This still does not help with the key though, there just isn't enough clearance to remove the key. Like you said, not a huge deal.
Ah yes. The key part is fun. Lol.

However, with my Pro Trial bag and stack of spacers (you wouldn’t need as many cause you don’t have the tank rack), I can get the key in and out, but it pops off so quick I’m not really concerned about this.

* Special note on these bags. I once attached the bag to the tank ring WITH the red release strap clamped between the bag ring and the tank ring and I could pull to release or pull the bag off. Luckily had my trusty Leatherman TI tool/pliers with me in the tank bag (lol) …I was able to pull the release strap with the pliers. — nothing was damaged.
 
Back
Top Bottom