monkeynuts
fast rider
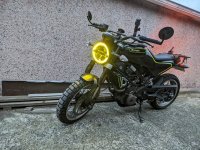
I had a thought and decided to strip the headlight down to see if it was possible to change the outer ring colour.
Cost was Zero, just an hour carefully pulling the light unit apart and sticking some yellow plastic between the LED chip and the clear plastic rings that give the white ring.
While I had the front in bits, I decided to do the LCD colour.


Cost was Zero, just an hour carefully pulling the light unit apart and sticking some yellow plastic between the LED chip and the clear plastic rings that give the white ring.
While I had the front in bits, I decided to do the LCD colour.