RobWCanada
expert rider
Valve clearance check is recommended at the 15,000 km service interval.
LONG POST, but it's not that complicated! Just putting all my thoughts down in case someone is having issues. I had never done this before, but I enjoyed it for the most part. If you're doubting yourself on doing this job it's really not that difficult. And you don't need to yank the motor...I don't see how ANYONE can think that's easier!!!
Well, lets get started. I was hesitant to do this myself as there isn't much info on this topic. A few YouTube videos out there but after doing it myself these YouTube videos are lacking some vital tips to get the job done smoothly. Anyway, I do all my maintenance myself (bike, snowmobile, cars, etc...) and after the dealer said it would be a $700 + tax (Canadian) bill I thought definitely not doing it there lol.
So, lets get right to the point. After doing it I would actually rate this job not too bad. It may look to be a pain (and it is), it's definitely tight quarters in the engine bay, but just take your time, read the service manual and the job goes pretty smoothly and before you know it the job is done!
Sadly, picture taking wasn't on my mind because there were already videos out there so I'll just try and let you guys know where I messed up certain things, which is probably very obvious to those who have done the job, or maybe not. Some of the videos I've seen on this topic don't do this (timing chain problem I had) so I'm not sure it is obvious. haha.
I will link to the videos I used as they did help me get through most of it and let me know what I was getting into. You'll see those at the end.
Bike has ODO of 16,726 km
PARTS:
MISCELLANEOUS:
LESSONS LEARNED AND TIPS:
It's a lot of writing but after it was done, it was actually not a big, complicated or stressful job. It actually went fairly smooth and after my math, only had one shim which needed correcting
FORMULA FOR SHIM ADJUSTMENT
New shim size = (measured clearance - desired clearance) + old shim size
x = (0.07 - 0.15) + 2.37
x = 2.29 mm
** so I picked a 2.30 mm shim. This was right at 0.10 mm and was a super tight drag, so JUST in spec. So I swapped out the shim for a 2.25 mm and it was perfect drag with a 2.25 mm shim. Now, looking at my numbers, I had a measured clearance of 0.06 OR 0.07 mm. It's hard cause you don't have that kinda accuracy with the feeler -- plus my measured OLD shim size of 2.37 mm was probably an error as it probably was a 2.35 mm shim. If you plug those numbers in you get [ 2.26 mm = (0.06 - 0.15) + 2.35 mm ]
Exhaust: 0.15 mm > 0.20 mm
Intake: 0.10 mm > 0.15 mm
So with my math, I did a bunch of scenarios ...really just for interest. I did the minimum, middle, and maximum. But in reality you only have shims which are 0.05 mm apart. So a 2.20, 2.25, 2.30, etc... so you just gotta pick one to the looser side. Like I said, I was on the minimum clearance for my intake at 0.10 mm and it was pretty tight so I decreased from 2.30 mm shim to a 2.25 mm shim and it was perfect. You can see it in my pics.
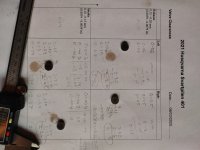
MY FINAL MEASUREMENTS:
Exhaust 1:

And once it was done, I tell you I think the engine sounded happier. Fired right up very quickly. And was putting along nicely. Seemed smoother but maybe I was imagining it...
Good videos for reference:
Really good post by Pro-X on adjusting valves:
 blog.pro-x.com

I have included this in case some are not sure what they are actually doing when making the shim smaller or bigger. When the crankshaft turns, the lobes move the valve down to the valve seat, sealing the intake or exhaust valve to the valve seat. So when the shim (#8) is too thick and tolerance too close to zero the lobe cannot push (#9 -- cam follower) and the valve down into the valve seat enough and cannot seal the valve on the cylinder head. So by reducing shim size the lobe moves the valve down more and there's less gap between the valve and valve seat, sealing the valve on combustion. (PS. I am not a mechanic, but that's how I understand it...someone can correct me if this is wrong)

This guy explains well. Hopefully my intake #1 isn’t too loose!
 youtu.be
Rob
LONG POST, but it's not that complicated! Just putting all my thoughts down in case someone is having issues. I had never done this before, but I enjoyed it for the most part. If you're doubting yourself on doing this job it's really not that difficult. And you don't need to yank the motor...I don't see how ANYONE can think that's easier!!!
Well, lets get started. I was hesitant to do this myself as there isn't much info on this topic. A few YouTube videos out there but after doing it myself these YouTube videos are lacking some vital tips to get the job done smoothly. Anyway, I do all my maintenance myself (bike, snowmobile, cars, etc...) and after the dealer said it would be a $700 + tax (Canadian) bill I thought definitely not doing it there lol.
So, lets get right to the point. After doing it I would actually rate this job not too bad. It may look to be a pain (and it is), it's definitely tight quarters in the engine bay, but just take your time, read the service manual and the job goes pretty smoothly and before you know it the job is done!
Sadly, picture taking wasn't on my mind because there were already videos out there so I'll just try and let you guys know where I messed up certain things, which is probably very obvious to those who have done the job, or maybe not. Some of the videos I've seen on this topic don't do this (timing chain problem I had) so I'm not sure it is obvious. haha.
I will link to the videos I used as they did help me get through most of it and let me know what I was getting into. You'll see those at the end.
Bike has ODO of 16,726 km
PARTS:
- 93836053000 - Valve cover gasket rubber (not really needed) #3
- 90236054000 - Gasket spark plug shaft (not really needed) #4
- 90136052010 - Decoupling element (not really needed) #25
- J025060204 - Hex collar screw M6X20 (Timing chain tensioner bolts -- odd, yes, but see tips...) (#20 in the diagram below)
- Wiseco VSK3 Premium 10.0mm OD Valve Shim Kit ($121.99 CDN on Amazon.ca)
MISCELLANEOUS:
- Brake cleaner (or any non-residue cleaner -- I use this cause it's pretty safe with rubber)
- Some sort of RTV sealant. I used Permatex Right Stuff 1 minute gasket maker ...this stuff is amazing. Not a runny mess like RTV black
- Tools, lol
- Feeler gauge -- mine is a Lisle Deluxe 31 feeler gauge (https://www.princessauto.com/en/deluxe-31-blade-feeler-gauge/product/PA0002990117)
- Assembly lube (I put my Motul 7100 10W50 in a little squirt bottle and used that. Worked amazing. (https://www.amazon.ca/gp/product/B0859XTBWW/ref=ppx_yo_dt_b_search_asin_title?ie=UTF8&psc=1) -- yes, that's a lot of bottles lol, but I have used quite a few!!!
- Music, beers, time
LESSONS LEARNED AND TIPS:
- All the videos I watched everyone says you mayneed a new gasket. I bought a new valve cover gasket, spark plug boot, spark plug sealing ring (big o-ring), decoupler gaskets (under the valve cover bolts), and a new spark plug.
- I used my new gaskets and o-rings, spark plug boot because I had bought them, but honestly, the old ones looked perfectly fine and I have in fact kept them for backup. I'm quite sure you don't need to buy these at this time in the bike's life. They didn't look deformed or squished.
- Decoupler elements were practically attached (heat welded lol) to my valve cover bolts ...I couldn't just pull them off. I guess the rubber forms to the bolts over time. So I didn't use the decoupler elements either. The old ones looked really good after cleaning them up anyway
- I used the new spark plug -- this is part of the 15,000 km service
- So the massive set of shims seems crazy, but considering the price of this service at the dealer, it really doesn't matter. However, you could figure out the size shims you need and try and buy them individually but if you're in between like I was on a few of them you could need one or the other.
- After my calculations, both exhaust valves were perfect
- 1 intake valve was perfect but the other was right at the minimum recommended, with quite a tight drag at 0.10 mm ...I didn't like that so removed the camholder again and put the next size down shim and it was perfect
- When checking the exhaust valve on the timing chain side, there is a small slit between the bottom of the camholder and cylinder head where a feeler gauge can fit (you can see this in Ari Henning's video when he's showing you how to check the valve clearance. Push the decompression leaver thing toward the centre of the cylinder so the feeler gauge can slide in easily. You can get the feeler gauge in but it's much easier moving the little leaver over.
- (18:40 ...slit reference)
- (Ari Henning)
- The same slit did not work for me on the intake side...too much wiring and crap back there
- Put your assembly lube (oil) on the feeler gauge blades. They will slide easier
- THIS IS IMPORTANT: When removing the cam shaft lobes (after removing the camholder) make sure to KEEP TENSION on the chain. Do NOT tie it loosely to the frame like I saw in so many videos. This will result in the chain coming off the bottom crankshaft sprocket and you having a hell of a time getting the chain back on.
- After removing both cam shafts from the cylinder head, while keeping tension on the chain pull the chain forward and hang a tool (like a T handle or something) off the chain or tie it down to keep tension on the chain (you can see it at 13:20 here:
- Whatever you do don't just do a lazy loose tie to a frame member. I did this and it came off the bottom crank sprocket (see attached photo for my solution lol)
- Solution involves a very strong piece of thin steel rod. I actually used a stainless steel coat hanger -- super strong (I needed bolt cutters) and not much flex. It was strong enough that it didn't flex when pushing and lifting the chain into place
- When the chain comes off it goes on the outer most part of the crankshaft (you can see this in some of the videos I posted -- there's just enough room for the chain to just rest in there without binding on anything (i.e. it spins freely around the crankshaft when not on the sprocket.
- To put the chain back on you gotta kinda lift the chain up and towards the back of the bike. This is because the CHAIN TENSIONER RAIL (15) is pushing the chain forward and makes the chain bind on the sprocket when trying to move it over, the sprocket is further back than the chain tensioner rail...if that makes sense
- I fiddled with this crap for like an HOUR...then stopped and thought haha. But once I made my super-tool-timing-chain-fixer-wand I literally had that chain on in less than 2 minutes!
- Alternative is to remove the clutch cover...which is kinda crap. So lets not do that!


- Un-bolt the radiator from it's mount, you can kinda pull it out and toward the left of the bike opening up the area so you can get your hand and feeler gauge in there to check the exhaust clearances
- When doing this MAKE SURE the mount bolts aren't spearing into your rad. I caught this before it was too late! I wish I took photos, but the rad rests very nicely on the bottom left mount stud of the radiator mount. Kinda 'locks' into the mount plate on the rad...it's not easy to describe...
- Use assembly lube on all parts (manual doesn't mention this). I just used my Motul 7100 10W50 in a bottle (Linked above).
- drop a bunch of oil on the new valve shims, under the cam follower (the little arm on top of the shim)
- more oil on the half moons where the camshafts rest in the cylinder head
- put camshafts in, more oil on top of the camshafts where the camholder makes contact
- I also put oil on the camshaft lobes
- When you have the cylinder head off make sure the camshaft lobes are POINTING UP.
- When cranking the engine over (go the direction of the arrow in the sight window where u line up TOP DEAD CENTER) ...I believe it is counter-clockwise
- There are two times when the top dead centre line lines up with the arrow, crank over several times until the line lines up and the cam shaft lobes are pointing up and the T on the timing gears are at the TOP (as in my pic)


- I have bolts listed above (top bolt is not in the pic lol)...
- These are the bolts for the timing chain tensioner
- I only list these because the top bolts is in such a PITA spot that when I was tightening it my 8mm wrench slipped off and the bolt is kinda soft and is easily rounded
- It's not damaged so much that I couldn't tighten it, but it's prolly a good idea to have a couple of spares on hand haha
- I have put the damaged one in the bottom now and will swap it out once I get a new one

- As in the manual, only put the RTV on the half moon part of the gasket
- manual says to put RTV on the cylinder head in the half moons, but that's impossible...lol
- I actually put the RTV on the half moons of the gasket and then pushed the gasket onto the CYLINDER HEAD (without the valve cover)
- Then I placed the valve cover on top of the gasket
- So, instead of putting the gasket in the valve cover and trying to get that whole mess in without mucking up your RTV I think my way makes more sense
It's a lot of writing but after it was done, it was actually not a big, complicated or stressful job. It actually went fairly smooth and after my math, only had one shim which needed correcting
FORMULA FOR SHIM ADJUSTMENT
New shim size = (measured clearance - desired clearance) + old shim size
x = (0.07 - 0.15) + 2.37
x = 2.29 mm
** so I picked a 2.30 mm shim. This was right at 0.10 mm and was a super tight drag, so JUST in spec. So I swapped out the shim for a 2.25 mm and it was perfect drag with a 2.25 mm shim. Now, looking at my numbers, I had a measured clearance of 0.06 OR 0.07 mm. It's hard cause you don't have that kinda accuracy with the feeler -- plus my measured OLD shim size of 2.37 mm was probably an error as it probably was a 2.35 mm shim. If you plug those numbers in you get [ 2.26 mm = (0.06 - 0.15) + 2.35 mm ]
Exhaust: 0.15 mm > 0.20 mm
Intake: 0.10 mm > 0.15 mm
So with my math, I did a bunch of scenarios ...really just for interest. I did the minimum, middle, and maximum. But in reality you only have shims which are 0.05 mm apart. So a 2.20, 2.25, 2.30, etc... so you just gotta pick one to the looser side. Like I said, I was on the minimum clearance for my intake at 0.10 mm and it was pretty tight so I decreased from 2.30 mm shim to a 2.25 mm shim and it was perfect. You can see it in my pics.
MY FINAL MEASUREMENTS:
Exhaust 1:
0.18 mm
Exhaust 2:0.18 mm
Intake 1:0.15 mm
Intake 2:0.135 mm
And once it was done, I tell you I think the engine sounded happier. Fired right up very quickly. And was putting along nicely. Seemed smoother but maybe I was imagining it...
Good videos for reference:
Rebuild video (in Hindu, but you can see the rebuild very well)
Hindu as well:
Ari Henning:

 www.youtube.com
How To Adjust the Valves on a KTM RC390 and Other Motorcycles | MC GARAGE
Adjusting the valves is likely the biggest maintenance procedure most motorcycles will ever need. In this video from the MC Garage, Ari Henning shows you how...
www.youtube.com
BushidoSteelCraft:
 www.youtube.com
How to check and adjust valve clearance on a 2021 Husqvarna Vitpilen 401
How to check and adjust valve clearance on a Husqvarna Vitpilen 401. Comment if you have questions, or want me to send you the guide I printed out. I live in...
www.youtube.com
Really good post by Pro-X on adjusting valves:
Checking and Adjusting Valves on Your Shim-Under-Bucket Style Motorcycle
Checking and adjusting valve clearance is part of common maintenance on a four-stroke motorcycle engine. Here, we go through the step-by-step process required to make sure the valves are in spec on your shim-under-bucket style valvetrain.
blog.pro-x.com
I have included this in case some are not sure what they are actually doing when making the shim smaller or bigger. When the crankshaft turns, the lobes move the valve down to the valve seat, sealing the intake or exhaust valve to the valve seat. So when the shim (#8) is too thick and tolerance too close to zero the lobe cannot push (#9 -- cam follower) and the valve down into the valve seat enough and cannot seal the valve on the cylinder head. So by reducing shim size the lobe moves the valve down more and there's less gap between the valve and valve seat, sealing the valve on combustion. (PS. I am not a mechanic, but that's how I understand it...someone can correct me if this is wrong)
This guy explains well. Hopefully my intake #1 isn’t too loose!
- YouTube
Enjoy the videos and music you love, upload original content, and share it all with friends, family, and the world on YouTube.
youtu.be
Rob
Last edited: