KiwiKev
fast rider
Heya team,
I did this more to save waiting for shipping than saving cash but now that cash can go towards some motogadget blaze pins") ,also I had some time on my hands and it was fun to tinker.
,also I had some time on my hands and it was fun to tinker.
I bought some 2.2 kohm by 1/2 watt resistors, as per SvePil's post on this forum (he suggested 1/4 watt which I couldn't get, cost was around $1 for a pack of 8.
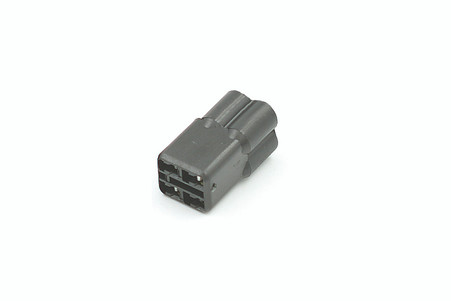
Removed all the crap as per the online vids.
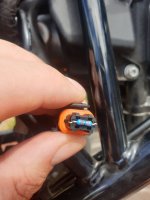
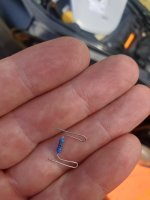
Bent the resistors as shown, then inserted them into the relevant plugs. They felt nice and tight and I'm confident its a nice positive connection. The slightly long pointy tails can then bend around the sides of the pug.
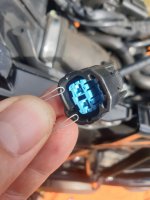
I had bought some heat shrink but don't have a heat gun and it was a touch windy to do it with a cigarette lighter, so I then just taped them with black electrical tape. This felt a bit nasty but I feel it'll seal as well as anything and will be sweet tucked under the seat, maybe I'll throw some heatshrink on top one day......
There was a plastic plug on the bottom of one of the removed hoses, this went into the trimmed back hose from the airbox. Currently the metal plate and hose from the head are just temporarily bunged up, I'll sort this when I'm back at my Fabrication shop next week.
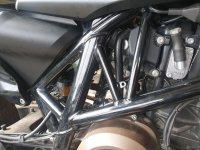
I had my whole tank off during the process, as I also had to tidy away kev's o2 mod. This gave me extra room to play and I managed to move around a fair bit wiring from inside the frame on the right rear of engine. It looks way tidier and shows off that beautiful trellis frame a lot more.
She's running well with no fault codes.
I did this more to save waiting for shipping than saving cash but now that cash can go towards some motogadget blaze pins
,also I had some time on my hands and it was fun to tinker.I bought some 2.2 kohm by 1/2 watt resistors, as per SvePil's post on this forum (he suggested 1/4 watt which I couldn't get, cost was around $1 for a pack of 8.
Removed all the crap as per the online vids.
Bent the resistors as shown, then inserted them into the relevant plugs. They felt nice and tight and I'm confident its a nice positive connection. The slightly long pointy tails can then bend around the sides of the pug.
I had bought some heat shrink but don't have a heat gun and it was a touch windy to do it with a cigarette lighter, so I then just taped them with black electrical tape. This felt a bit nasty but I feel it'll seal as well as anything and will be sweet tucked under the seat, maybe I'll throw some heatshrink on top one day......
There was a plastic plug on the bottom of one of the removed hoses, this went into the trimmed back hose from the airbox. Currently the metal plate and hose from the head are just temporarily bunged up, I'll sort this when I'm back at my Fabrication shop next week.
I had my whole tank off during the process, as I also had to tidy away kev's o2 mod. This gave me extra room to play and I managed to move around a fair bit wiring from inside the frame on the right rear of engine. It looks way tidier and shows off that beautiful trellis frame a lot more.
She's running well with no fault codes.
Attachments

Last edited:


 .
.