My New Svart 401

Jester1971

expert rider
Joined
Sep 22, 2023
Messages
197
Location
Suffolk, England, UK
Hello all, I am new here and new to Husky bikes. I have recently bought a new Svartpilen 401 and I thought I'd share some things I've done and plan to do. I have stored Her away for winter here in the UK as they have just started salting the roads (I don't know what the UK would do if they had proper winters) and I am old and a fair weather biker.

So far....
Removed number plate bracket ( that is a lot of extra weight for the shock to move around) and fitted an R&G tail tidy whilst retaining the stock number plate light.
Removed the tank rack, though this may be going back on if I cannot find a suitable rear seat bag that I like.
Made an aluminium chain guard to replace massive plastic original.
Currently in the process of removing all of the unnecessary stickers on frame, tank, engine etc.
India's finest Rolon drive chain replaced with DID 'x'ring gold before it kills both sprockets.
Painted the day-glow yellow inserts on the radiator shrouds.
I have also reset the front brake caliper to centralise it and taken brake fluid from both F&R reservoirs, they were way to full causing drag on both brakes.
Shimmed the flappy clutch lever with brass shim.
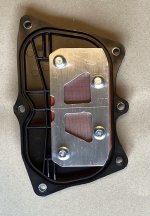
Oil and filter-screens changed at 340 miles, early I know but wanted the old stuff out before storing for winter. Motul 7100 used as no Motorex near me.

Future planned work (subject to change daily as funds allow) may happen....
Fuel x lite.
Arrow slip on probably with Db killer removed, depending on noise.
DNA filter lid.
K&N main filter
Possibly bar end mirrors but I am on the fence about them at the moment, I don't mind the round ones too much.

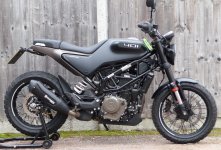
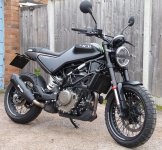
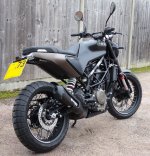
Anyway enough waffle here are some pics (hopefully as I am not great with computers) of a mainly standard bike.

401-01.JPG401-02.JPG401-04.JPG401-05.JPG

Comments, advise welcomed, thank you for looking, Jes.
 
Welcome to the forum. A ton of great information here that has been a big help to me in my modifications. I really like that chain guard you put on there. And the other mods are very smart! Keep us updated on your journey as it’s nice to hear what other people are doing to theirs.
 
Welcome and congratulations. It's obvious from the mods that you made that you have a lot of experience in owning motorcycles.

What motorcycles have you owned in the past?
 
Welcome to the forum. A ton of great information here that has been a big help to me in my modifications. I really like that chain guard you put on there. And the other mods are very smart! Keep us updated on your journey as it’s nice to hear what other people are doing to theirs.
The information is got me here. The chain guard took a couple of hours to make and then just painted, I could have bought one but I like making bits if I can.I will keep you informed as I make changes but for the next few months the bike will be in winter storage.
 
Welcome and congratulations. It's obvious from the mods that you made that you have a lot of experience in owning motorcycles.

What motorcycles have you owned in the past?
Suzuki ER50
Suzuki GT185
Yamaha DT50
Yamaha RD200
The above were bought as non runners and returned back to life.
Suzuki TS125X bought new.
Yamaha RD350LC
Honda Hornet 600

Then a 15 year break from bikes until this Husky in September.
 
Hello all, I am new here and new to Husky bikes. I have recently bought a new Svartpilen 401 and I thought I'd share some things I've done and plan to do. I have stored Her away for winter here in the UK as they have just started salting the roads (I don't know what the UK would do if they had proper winters) and I am old and a fair weather biker.

So far....
Removed number plate bracket ( that is a lot of extra weight for the shock to move around) and fitted an R&G tail tidy whilst retaining the stock number plate light.
Removed the tank rack, though this may be going back on if I cannot find a suitable rear seat bag that I like.
Made an aluminium chain guard to replace massive plastic original.
Currently in the process of removing all of the unnecessary stickers on frame, tank, engine etc.
India's finest Rolon drive chain replaced with DID 'x'ring gold before it kills both sprockets.
Painted the day-glow yellow inserts on the radiator shrouds.
I have also reset the front brake caliper to centralise it and taken brake fluid from both F&R reservoirs, they were way to full causing drag on both brakes.
Shimmed the flappy clutch lever with brass shim.
Oil and filter-screens changed at 340 miles, early I know but wanted the old stuff out before storing for winter. Motul 7100 used as no Motorex near me.

Future planned work (subject to change daily as funds allow) may happen....
Fuel x lite.
Arrow slip on probably with Db killer removed, depending on noise.
DNA filter lid.
K&N main filter
Possibly bar end mirrors but I am on the fence about them at the moment, I don't mind the round ones too much.

Anyway enough waffle here are some pics (hopefully as I am not great with computers) of a mainly standard bike.

View attachment 4790View attachment 4787View attachment 4788View attachment 4789

Comments, advise welcomed, thank you for looking, Jes.


I just picked up ap 23 myself. Didn't realize they were shipped with a junk chain. I'll be replacing mine with a DID.

Do you have a link to the one you purchased w/ the correct amount of links etc?
 
Chain was from SPORTSBIKESHOP here in the UK, I’m not sure if they post to you but it is a DID heavy duty 520 VXGB 112links, mine came with rivet link plus an old clip style link and a little sachet of lube for the link ‘x’rings. I have used rivet link as I already had the tool. £72 for the chain if that helps.
Mine is standard gearing 15/45, I think they are all the same?
I did not say chain was bad, it is just most people say they do not last long so I changed it before it wears the sprockets and I like a nice clean gold chain.
 
Nice! Thanks for sharing! Regarding shimming the clutch lever. Did you have to replace the bolt that had it in place to begin with or could you re-use the same bolt? I really need to do this but haven’t dared to do it so far.
 
Used the same bolt, it is stepped so not an easy replace.
When you start undo the nut on the bottom of the bolt before trying to undo the bolt or you will strip the thread from the lever housing. It is easier if you remove the clutch micro switch also as the lever will not come off with it in place. Once the lever is able to come out I removed the clutch cable, then clean all the paint off where the pivot is, just where the pivot is. Then I made a brass washer (shim) with a hole to fit the pivot bolt and large enough so you cannot see it when the lever is in place. Then sanded the shim till it filled the gap when the pivot bolt was tightened. I used brass as it is soft and the lever and holder are aluminium. It will wear out but then I’ll make another.
You can just remove the nut then pivot bolt and slide a shim washer in if you do not want to touch the micro switch, but the paint around where the lever pivots will accelerate the wear. Hope this helps.
Thanks a lot! I think I’be actually been looking at the wrong bolt because mine looks like it’s locked in place with some sort of one-use washer. I’ll take a closer look again when it’s not -8*c.
 
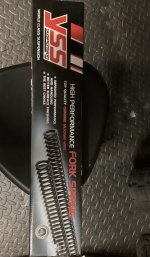
Slight update, I felt the forks were struggling with my 95kg. Especially under heavy braking where the front would dive drastically. So, after lots of research ( including numerous emails to WP UK, which ended in an answer of ‘we have nothing for you’ ) I finally found some springs that fit. They are YSS linear springs for the KTM adventure 390. The KTM uses the same forks but with 170mm of travel.
IMG_0911.jpeg
IMG_0912.jpeg
The new springs are 7.5 Nm/mm, and at 350mm in length fit perfectly.
I changed the oil to Motul 5w

IMG_0914.jpeg

YSS recommended 10w oil but that felt like the damping was on full at 30 clicks out, so I went with 5w. I put 420ml per leg for testing ( once the UK weather warms up ) I can easily add or remove oil to fine tune.
My rider sag is now 37mm, it was 67mm with the standard springs.

Thanks for looking, Jes.
 
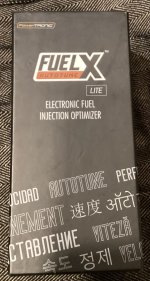
I have also received my fuelx lite.

IMG_0920.jpeg
IMG_0921.jpeg

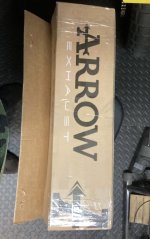
and more importantly Arrow in Italy finished making my slip on.

IMG_0917.jpeg

IMG_0915.jpeg

IMG_0919.jpeg

I went for brushed stainless over the black as if the black coating gets scratched I think they look rough.
I will be fitting this when I’ve finished running my bike in, hopefully very soon.

I will of course post pictures when she’s on.

Thanks for looking, Jes.
 
Slight update, I felt the forks were struggling with my 95kg. Especially under heavy braking where the front would dive drastically. So, after lots of research ( including numerous emails to WP UK, which ended in an answer of ‘we have nothing for you’ ) I finally found some springs that fit. They are YSS linear springs for the KTM adventure 390. The KTM uses the same forks but with 170mm of travel.
View attachment 5013
View attachment 5014
The new springs are 7.5 Nm/mm, and at 350mm in length fit perfectly.
I changed the oil to Motul 5w

View attachment 5015

YSS recommended 10w oil but that felt like the damping was on full at 30 clicks out, so I went with 5w. I put 420ml per leg for testing ( once the UK weather warms up ) I can easily add or remove oil to fine tune.
My rider sag is now 37mm, it was 67mm with the standard springs.

Thanks for looking, Jes.
Very interesting. Does this mean your fork will be longer than previously? What does the current sag amount to in % of full stroke?
 
Very interesting. Does this mean your fork will be longer than previously? What does the current sag amount to in % of full stroke?
No travel will stay the same. The length of travel is determined by the length of the damper rod. I measured my travel by removing the spring and re-assembling the fork and measuring between max and minimum stroke. This is 142mm, so the damper rod in our bikes is 142mm, the KTM Adv has a damper rod that is 170mm. The spring is the same length as my original at 350mm. I found the KTM spring by removing mine and measuring the width (36.5mm) and the length (350mm) and giving these to a suspension specialist (Brook suspension) here in the uk. The only spring on there system was the KTM Adv 390 one. It just meant the top cap was harder to fit back on the damper when re-assembling. I had to compress the spring a bit to fit it, as the new spring (being linear) has no softer (progressive) top coils. I hope that makes sense.

I have seen others (on a thread on this forum) use springs from other forks with coils cut off, and spacers etc. This unfortunately this means you reduce the space between the coils, too short of a spring length and the spring will lock up, causing bottoming out.
It is wrong in my opinion that WP will not supply different springs for their own forks. I guess our forks are at the very low budget end.
 
Would love to hear that exhaust..
I will not be fitting it for at least a couple of months.
There is a good video on youtube. Sorry I am old and do not know how to put links in. Just search ‘Arrow pro race on Vitpilen’ vid is by Voshkof?
Basically that vid is what made me decide to go with the Arrow, with the Db killer out it is mean!
 
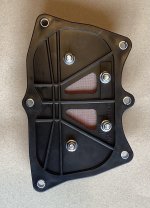
Finally managed to get some time in the garage today. I bought a spare lid from Huskyparts (£28) filter foam is from eBay (£7) I already had the alloy plate and mesh. I have made a modded airbox cover. I know you can buy very good (and some not so good) ones already but I think they let way too much air through the filter box top. KTM have spent time in R&D making an air box and filter that works, I just think it needs a little more air coming in, just a little.
The foam is fine automotive grade which is washable.

Pics,
All the parts, foam is protected by fine stainless mesh.
IMG_0927.jpeg

Filter foam and alloy spacers are 15mm,
IMG_0929.jpeg

Top side,
IMG_0925.jpeg

Inside,
IMG_0926.jpeg

Assembled with loctite, I can easily take apart for cleaning and I have enough foam for 6 x replacements.
My worry was the bolts would come loose and get into the intake, I have paint marked them so I can pop the seat off to check after the first test rides. I will be fitting this with my Arrow pipe and FuelX lite in the coming months. I’ll let you know how it goes.

Thanks for looking, Jes.
 
Back
Top Bottom